GoldenGate Marketplace Image Installation
Installation and configuration of the Oracle GoldenGate Marketplace Image for Oracle database migrations.
Licensing
The GoldenGate Marketplace Image for Migrations can be used for a period of 183 days for free when used to migrate Oracle databases to OCI with tools like Zero Downtime Migration or OCI Database Migration.
Prerequisites
The following resources must be available in OCI to install the GoldenGate Marketplace Image:
- Compartment
- Virtual Cloud Network
- Subnet
Installation
1. Create Instance
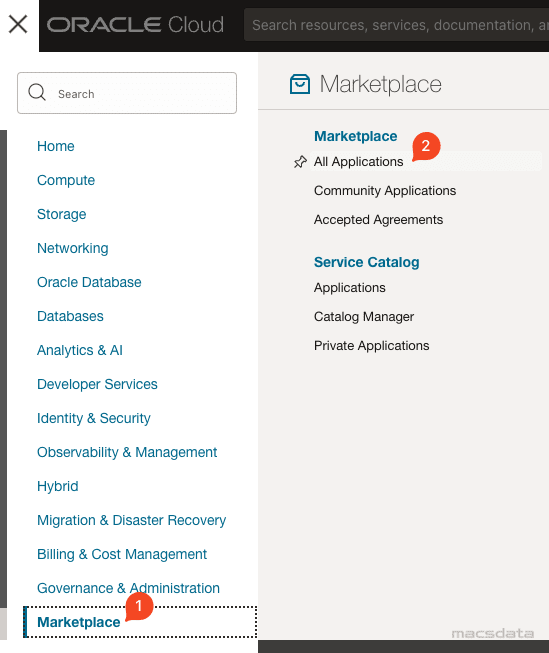
- After login to OCI click on the menu and select Marketplace from the drop down list
- Select All Aplications from the Marketplace menu
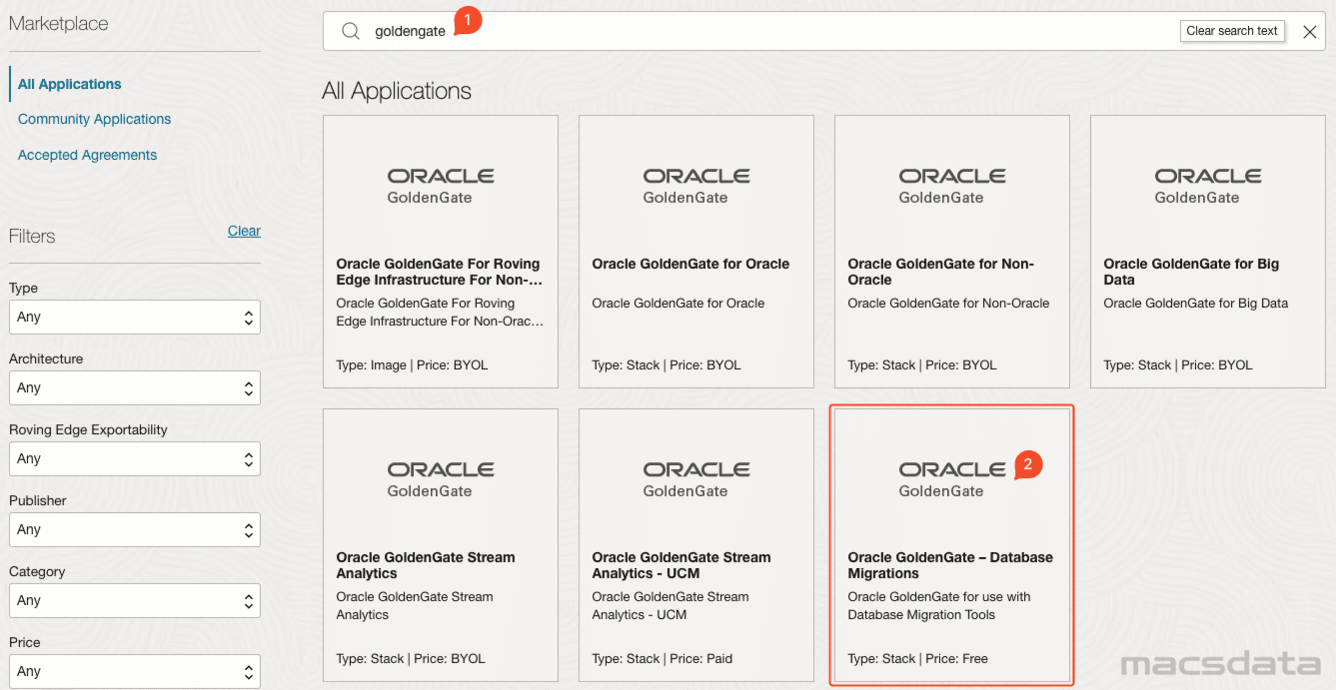
- Enter
goldengatein the search field and hit enter - Select the Oracle GoldenGate - Database Migrations image
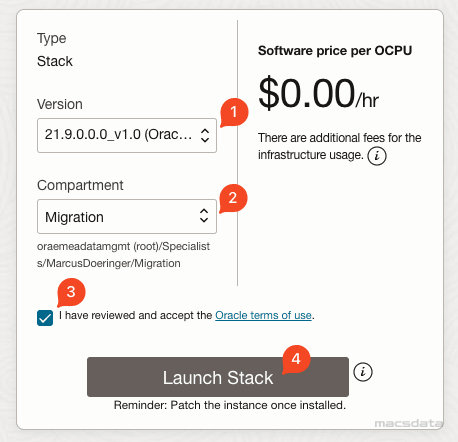
- Make sure the latest version and correct image is selected (this should already be set by default)
- Choose a compartment
- Accept the terms of use
- Click on Launch Stack to create a Resource Manager stack in OCI
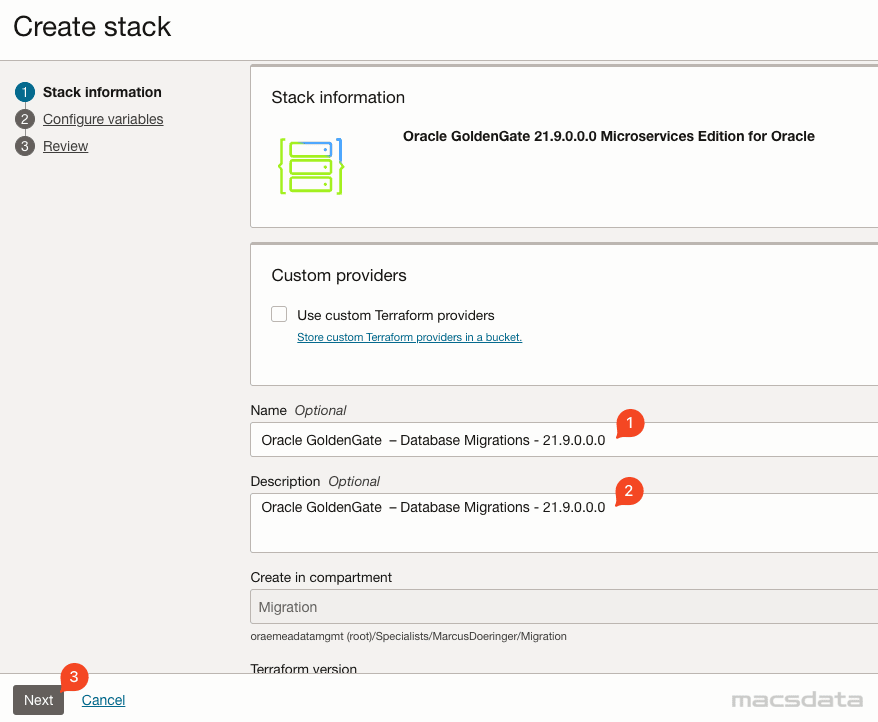
- Specify a Name for the OCI Resource Manager stack
- Specify a Description for the OCI Resource Manager stack
- Click Next
- Specify a Display Name
- Specify a Host DNS Name
Make sure this name is not already used by another host in this network
- Select the VCN Network Compartment
- Select the VCN
- Select the Subnet Network Compartment
- Select the Subnet
- Select the Availability Domain
- Specifiy the Compute Shape
More information about the CPU requirements for the GoldenGate compute instance can be found in the ZDM documentation: Oracle GoldenGate server CPU requirements
- If the GoldenGate instance should be available via a public IP then select Assign Public IP
- Optionally specify a Custom Volume Size
- Specify a Deployment Name. Default
Marketplaceis fine - If you have already created a target Autonomous Database to migrate to you can specify the database here
- Paste the SSH Public Key to allow SSH access to the instance
- Click Next

On the stack summary information review page check Run apply and click Create to start the execution of the Resource Manager stack.
Wait until the status of the Resource Manager job changes to SUCCEEDED.
2. Compute Login
- From the OCI menu select Compute
- Select Instances from the Compute menu

- Get the IP address of the newly provisioned compute instance

Use an ssh client to login to the system as opc user.
ssh opc@<ipadress/hostname>
3. GoldenGate Login
In the opc home directory on the GoldenGate compute instance you will find the file ogg-credentials.json. This file contains the username and password to login to the GoldenGate instance after the installation.
cat ogg-credentials.json
The following output will be shown:
{"username": "oggadmin", "credential": "<password>"}
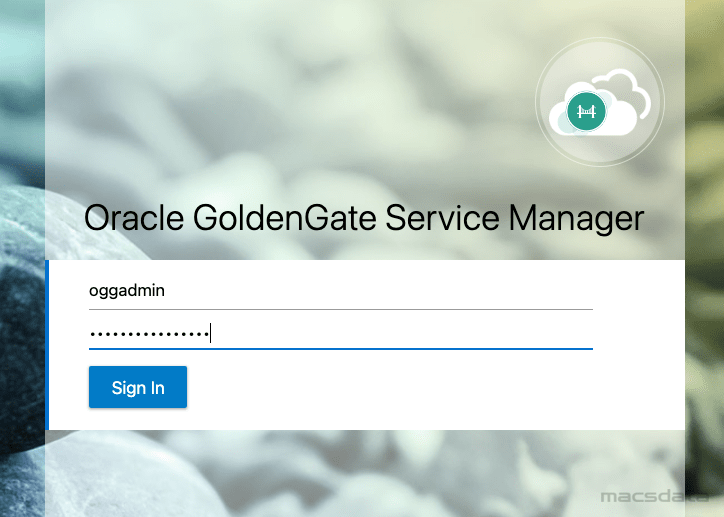
This information can now be used to login to GoldenGate. Open a Web Browser and connect to the GoldenGate compute instance IP or hostname.
https://<ipaddress or hostname>
Accept any possible SSL certificate errors in your browser.
In case you are using Google Chrome click anywhere in the browser window and enter: thisisunsafe
Use the username and password from the ogg-credentials.json file to login to GoldenGate.
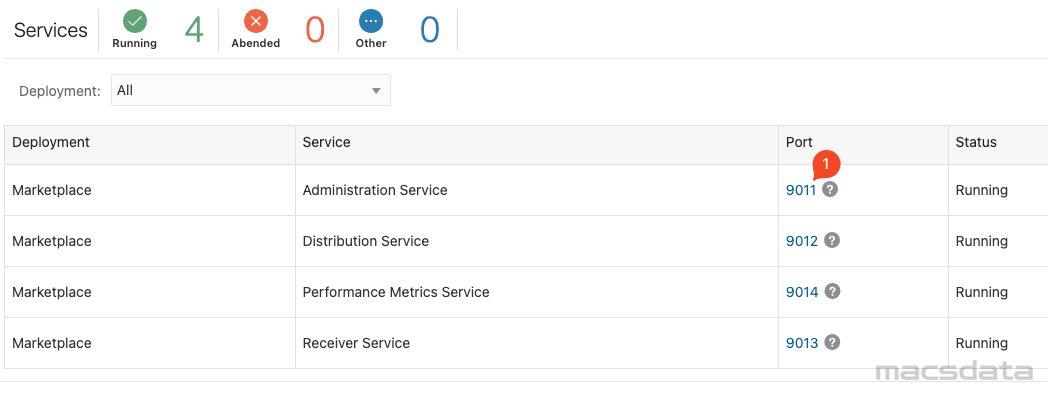
After you logged in you should see 4 services running:

4. Change Passwords
The password of the oggadmin user should be changed after the first login. It needs to be changed in the Service Manager and also in the Administration Service of GoldenGate.
Service Manager
To change the password:
- In the upper right corner click on the user icon
- select Change Password from the menu

Re-login to the Golden Gate Service Manager with the new password.
Administration Service
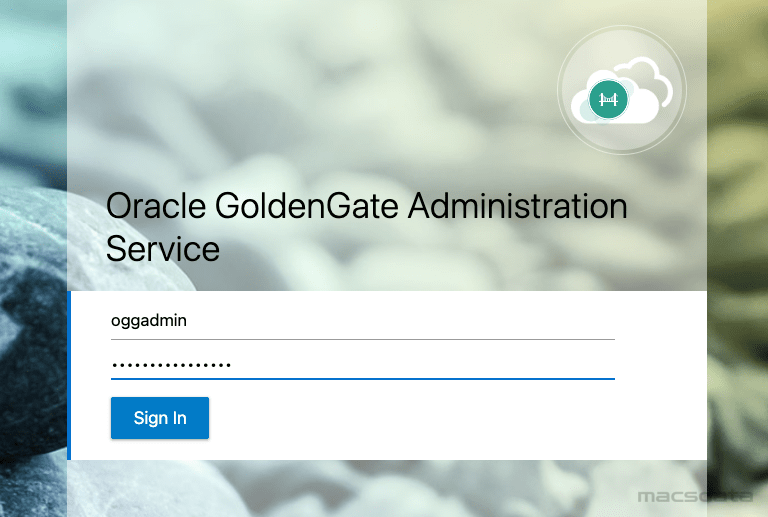
- Click on the 9111 link in the Service Manager to open the Administration Service
A new Tab will open with request to login to the GoldenGate Administration Service. Login with the credentials from the ogg-credentials.json file.
To change the password:
- In the upper right corner click on the user icon
- select Change Password from the menu

Re-login to the Golden Gate Administration Service with the new password.
Parameters for DMS / ZDM
The following relevant GoldenGate parameters are used in OCI Database Migration and Zero Downtime Migration:
- GoldenGate Username
Installation Default:oggadmin - GoldenGate URL
https://<ipaddress or hostname> - Source Deploymentname
Installation Default:Marketplace - Target Deploymentname
Installation Default:Marketplace